


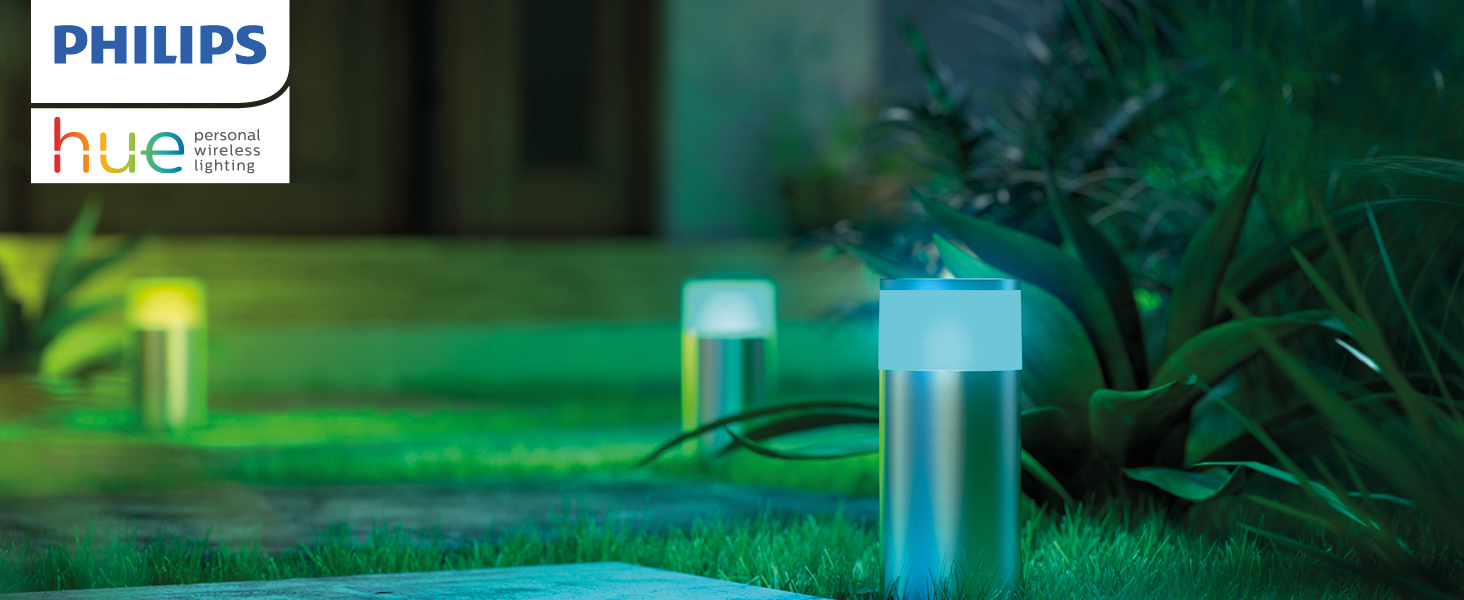
One of the most important and main advantages of the Philips Hue smart lighting is its simple use and user-friendliness. And that is in every case. Maybe you have already read about it in our recent article. Whether you control the Hue using the Hue app, voice, motion sensors, or smart switches. And all this does not only apply to your household. Vice versa. Your terrace, garden, or backyard will work in perfect symbiosis with a collection of low-voltage outdoor lighting.
What does „low-voltage lighting“ mean?
Shortly: the biggest plus of the Philips Hue low-voltage outdoor lighting is its connection. It requires nothing more than a standard outlet, so you don't have to use mains voltage in your home. This is because low-voltage lighting uses a transformer that can reduce the voltage.

A few products, perfect harmony
Good preparation is the key to success. So, before we start with the installation, we will check if we have all the necessary equipment. On the table, put side by side the low-voltage spotlights or floor lights (whichever you are installing), power supply unit (PSU), T-connectors, and extension cables.
Note: All low-voltage lights are supplied with the necessary cables and power supply.
No science, you can handle the installation easily
Let's start. First, place the light in the garden (or anywhere else you want to light up your outdoor spaces). Make sure that the distance from the light to the closest Philips Hue or Hue Bridge light in your home is at a maximum of 15 meters. The reason is obvious: the Philips Hue smart lights form a network and every other light expands the Zigbee signal.
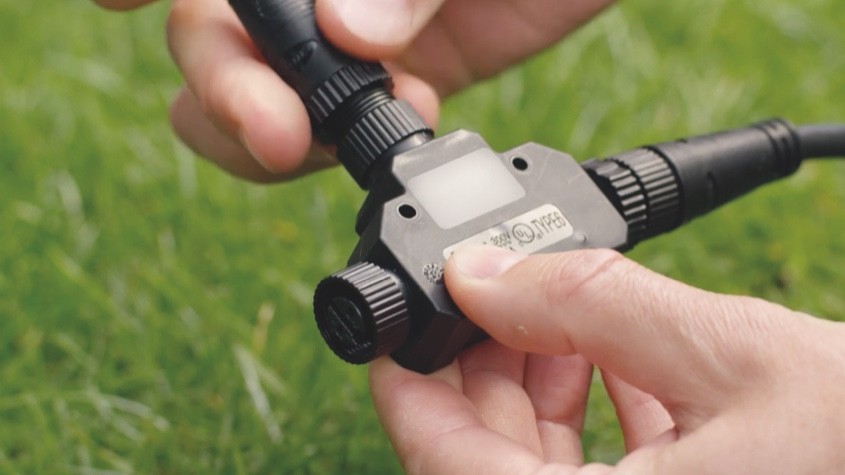
In the next step, you need the T-connector and connect it to the light. It is easy, you will simply screw it on without tools. If you want to connect more lights, you just need: an extension cable between the individual T-connectors. All this is done just by using a single power supply. The maximum cable length is 35 meters, so that's how to interconnect a big part of your garden. And believe us, expanding is as easy as the connection.
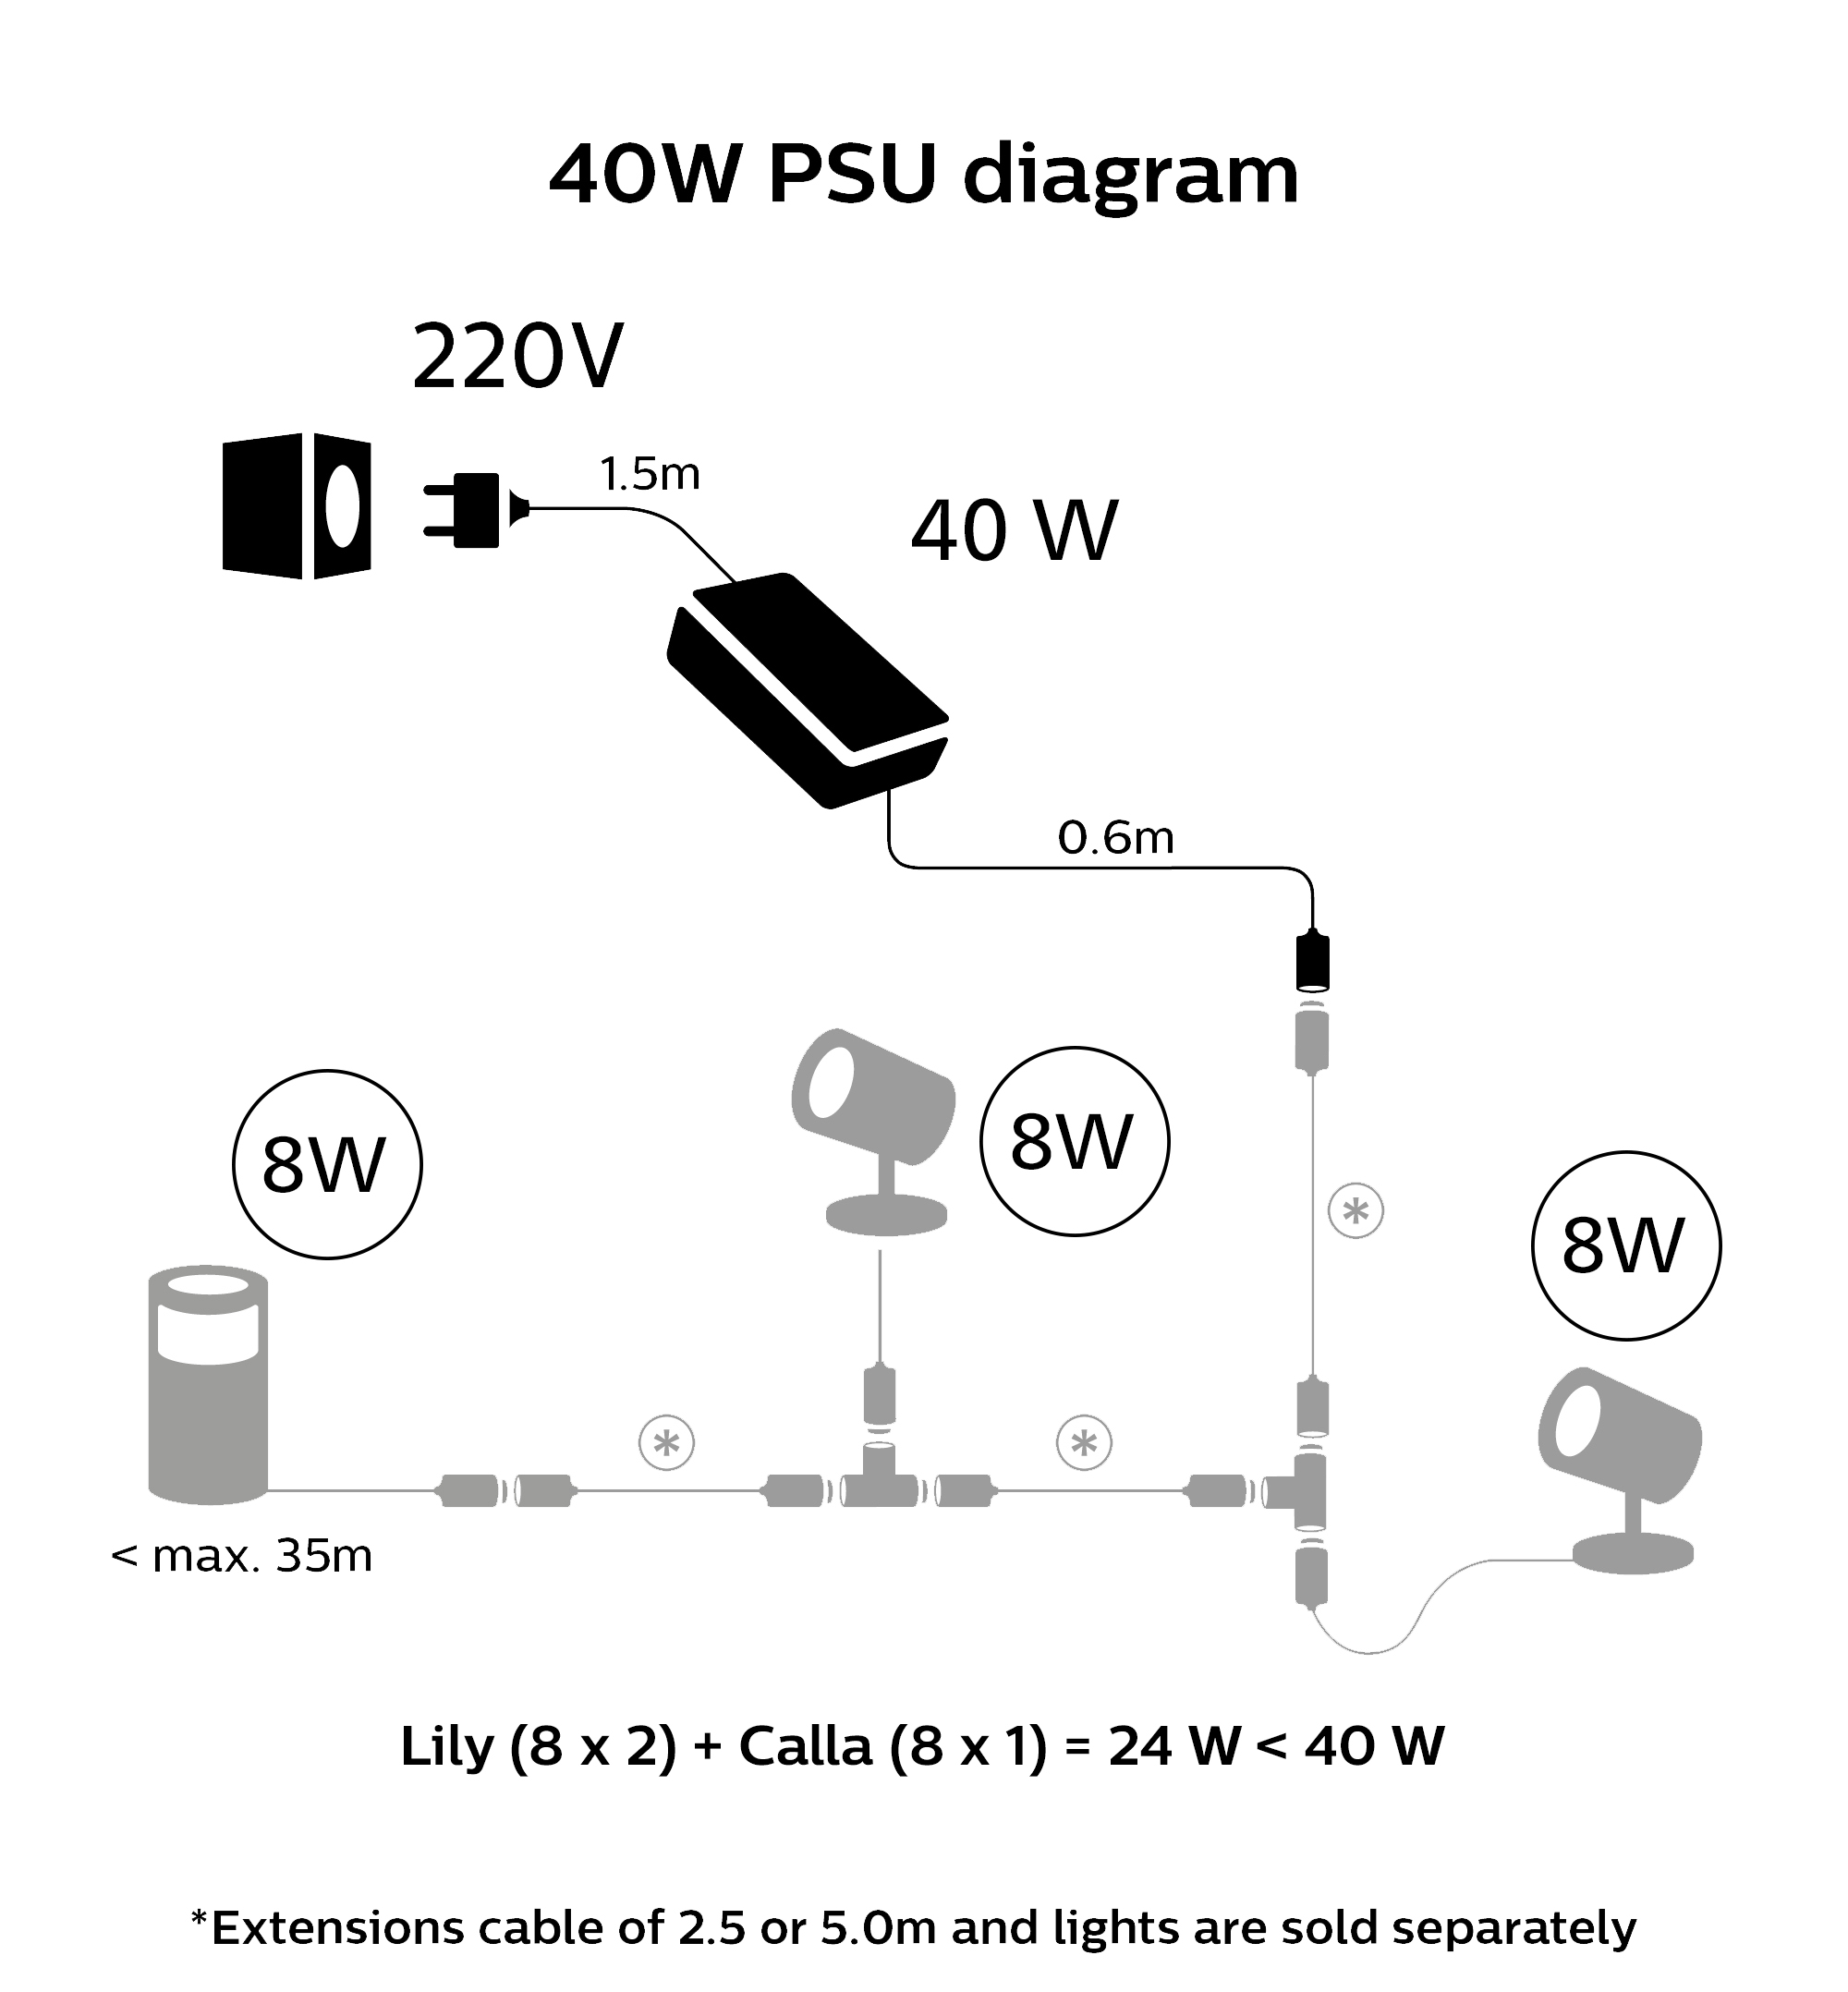
Note: To find out how many lights you can connect to one source, just add up the power consumption of the individual pieces. Simply said, the total input power must be equal to or lower than the output of the source. For example:
- Lights Econic and Calla: each 8 W
- Light Lily: 8 W
- Light Lily XL: 15 W
- Outdoor lighting strip (2-meter): 19 W
- Outdoor lighting strip (5-meter): 37,5 W
Example of Philips Hue low-voltage lighting using a 40 W power supply:
Three pieces of the Lily lights and two pieces of the Calla lights. Both types of lights have 8 watts each, so we calculate the final input power easily: Lily (8 x 3) + Calla (8 x 2) = 40 W.
Find the outlet, connect it, light it up
Did you already connect all the lights you wanted to connect? We will continue by selecting and finding the correct outlet into which you will insert the power supply. Are you done? In that case, you can add your lights to your Hue system. Abracadabra. It's so easy to illuminate the exterior of your house with 16 million colors.
 Paulina


